AI Cinematic Creation: From Concept to Completion in 5 Steps. Transform static AI imagery into stunning cinematic videos using a streamlined workflow. This guide combines ChatGPT for creative direction, ImageFX for base image generation, KlingAI and Higgsfield for animation transformation, and CapCut for professional production - creating cinematic experiences in a fraction of traditional time.
Video Example & Process Images
See the finished result of this workflow and the key images used in the process
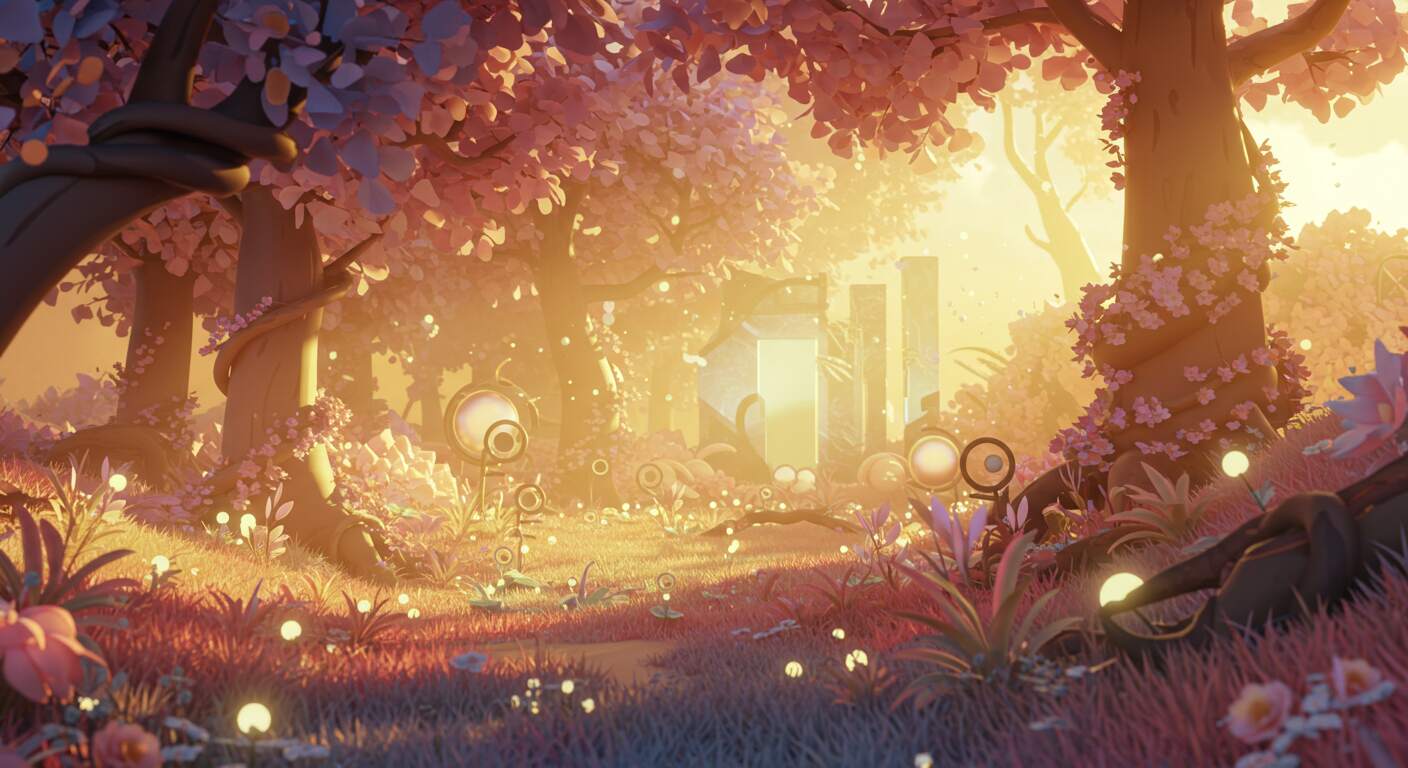
Starting AI Images


Final AI Generated Cinematic Video

Prompt Your Video Ideas
- Start by having AI generate multiple workflow options, then select the foundation that best matches your vision.
Use this initial prompt:
Generate 5 original, visually striking AI video concepts that follow a multi-step creative workflow using ChatGPT-4o for still image generation, Kling AI for animation, and Higgsfield for cinematic transitions. For each idea, present: A step-by-step visual sequence, key stills to generate with ChatGPT-4o and tasks for Kling AI and Higgsfield to animate.Choose one, and right away get maximum value by requesting:
Improve this AI video production workflow for clarity and efficiency. Optimize each production stage. Suggest specific prompts for generating assets. Identify where to split the process into separate shots/sequences. Recommend efficient assembly methods. My current workflow is as follows: [INSERT YOUR WORKFLOW HERE]- Pro tip: Always specify your intended tools (ImageFX, KlingAI, Higgsfield, etc.) so the AI can tailor prompts to each platform's strengths.
Generate Base Images That Actually Work
- I used ChatGPT (great for prompts with specific guidance) and ImagenFX (free without a limit on usage, great for testing out different prompts)
- Generate 4 images for each shot in your sequence (flexibility for the animation phase).
Rather than using generic prompts like "create a beautiful sunset," use the ones generated by ChatGPT in Step 1:
Abandoned brutalist architecture overtaken by lush vegetation, golden hour lighting casting long shadows, cinematic aspect ratio, atmospheric haze, hyperrealistic detail, shot from below to emphasize scale
Bring Static Images to Life
- I use two methods in Kling depending on the scene:
- Method 1 (For precise control): Upload first and last frames when I need specific start/end points. Here I used it for the tree transformation.
- Method 2 (For creative interpretation): Upload 4 reference images when I want the AI to have creative freedom. Really good to get new ideas as well, the AI can come up with good stuff.
- Critical step most people miss: After uploading your images, don't just use the default prompts. Let the DeepSeek in built feature analyze and enhance them.
KlingAI (Primary Animation)
- I use Higgsfield to fill transition gaps and add precise camera movements that KlingAI sometimes struggles with. The free tier limits are tighter, so I reserve it for specific transition and camera movements. Here I used it for the seed falling into the ground and tree growing.
Higgsfield (Transition Refinement)
Create consistency between shots
- This is where we get the individual clips to flow well into each other.
- Visual Consistency: I apply subtle color changes to match the colour grading between the shots. Some of the shots weren't as "golden hour" colour as the other ones, so I increased the saturation.
- Transition: You'd have to be lucky to get separate shots that transition well into one another. That's why CapCut is amazing here - it has load of preset transitions that can make them flow really well into each other. Here are the ones I used here:
- Spin Clockwise
- Floodlight
- Then and Now
- Woosh
- Inhale
Music & SFX
- First, if you'd like all of the SFX and Music that's in the AI video for free, enter your details here and I'll send them to you (Extra free Text-to-SFX cheat sheet included):
- To see how I created the Music and SFX for this (both AI generated), check out the previous workflow on AI Sound Design and AI Music for Video You can also check out my video on AI Sound Design. The workflow stays the same.
Tools used in this workflow: